 Pinterest Picture: magnoliamarket.com Pinterest Picture: magnoliamarket.com I am finally taking a night off of working at the house since I have a crazy work day tomorrow…May 17th is World Hypertension Day! Get your blood pressure checked and help the World Hypertension League meet their goal of 3 million blood pressure screenings!...shameless public health plug. Anyways…it has been a busy, productive week at the house. Many visitors have come out to help. I have really appreciated all of the support and hope I can return the favor someday soon. Project 1: Stripping the Banister Every piece of woodwork in the old part of the home has been painted. I saw a picture of a staircase on Pinterest where the banister was stained and the spindles were painted white. I decided to do this. I bought some paint stripper from Home Depot. I found one that was foam in hopes that it would not drip everywhere. So this is what I did:  Step 1: Collect your supplies. I used Klean Strip™ Premium Stripper. I taped all of the spindles. You will want a sharp scraper. I got a few in different sizes due to the shape of the banister. You may want to invest in tarps to protect the flooring. Also, do not forget your protective gear, a mask and durable gloves. Trust me…this stripper burns when it comes in contact with your skin. Non-latex gloves did not help much either. I ended up using construction gloves, and they kept my skin protected. Step 2: Protect the areas that you do not want striped. I placed blue tape on the spindles. I cut a few garbage bags and laid them on the ground (I did not have any tarps).
Step 3: Spray the paint stripper and cover all of the desired area. You need to wait for a short period of time to begin scraping. For my project, I had to wait about 15-20 minutes.
Step 4: Once the paint appears to be peeling off, use the scraper to remove the paint. Go with the grain of the wood.
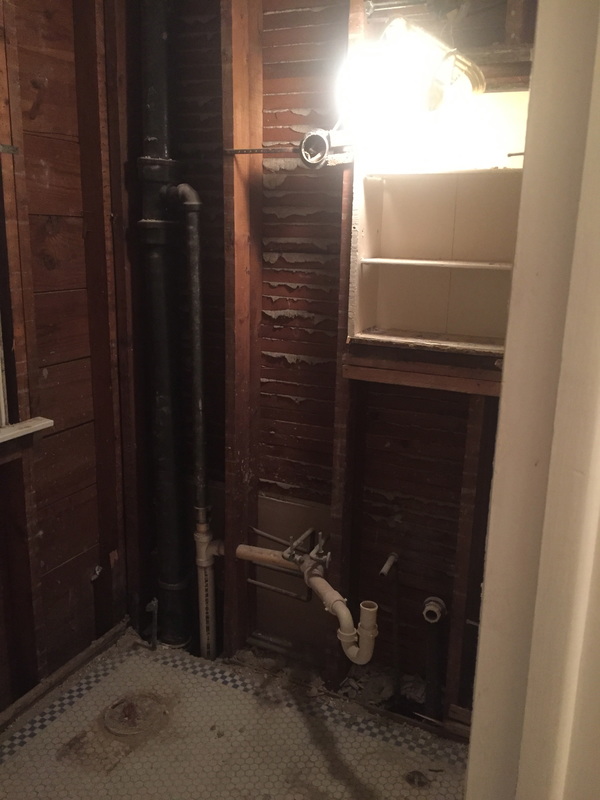
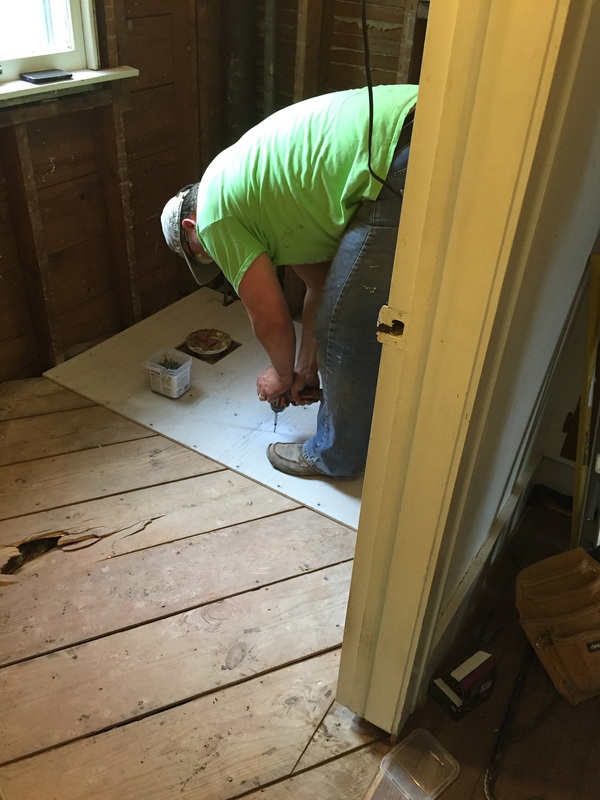
 Step 5: Reapply the paint stripper if you were unable to get off all of the paint. There were 3 layers of paint and 1 layer of stain on my banister. I ended up having to repeat it 3 times. **Next Weekend** Step 6: Sanding and re-staining! I attempted to sand it and did not feel comfortable at all with the sander…Dad Project! Project 2: DEMO BATHROOM DAY! I finally got to knock down some plaster! Let me tell you…if you are having a bad week, find yourself something to demo. Swinging a hammer and knocking things down just took stress away. My dad and I decided that the first major project that needs to get done is renovating the full bathroom. Throughout the week, my dad and I began removing the wall tiles, the bathroom fixtures, and the tub. I am a germaphobe…and my dad made me help me carry down the toilet! I had such a hard time with that. I know it probably sounds ridiculous, but I am not about that and I think I washed my hands raw that night. I highly suggest cleaning up your demo as you go. We made sure to clean up any debris before we would leave for the night. I think it just helped move the project along. It was really cool to see the window’s hardware. My windows open and shut using a weight system. It is neat to see how it works. The tub was the difficult part to remove. We (my dad mostly) had to cut it in half in order to get it out. Cousin Paulie, my dad’s cousin, came out and helped remove the floor. (I ended up saving some of the tiles. Not sure what to do with them. If you have any ideas, let me know!) I love it when my dad gets together with family members/old friends. All the stories start coming out. This weekend, I got stuck listening to these two singing polka music. Next, came shopping…the fun part to me, not my wallet! Lowe’s and Home Depot are usually next to each other so do not be afraid to get things from both. Home Depot had a good sale on a toilet and a tub so we got those there. Tip: Check out the tiles on the floor. Most likely, they are on sale. That is what I ended up purchasing. Lowe’s had a vanity I wanted as well as a countertop. After purchasing a faucet and showerhead, I had the supplies I needed for a bathroom. My dad also got: thin-set, liquid nails, cement boards, and drywall (those are not so fun to show). My dad’s good friend Mark also showed up and helped lay down the cement boards and install the tub. Project 3: The Basement My house is still propped up by jacks. But we did make some progress with leveling the flooring in the living room. Cousin Paulie helped my dad build the new walls that will support the house once the jacks are removed. The crawlspace is also coming along. My dad has started adding insulation. He cleared out the space, but we still have a pile of dirt to remove. He also installed overhead lighting in the crawlspace. Project 4: The Backyard and Garage I started clearing out the garage. The garage will also need to be jacked up and new walls will need to be built. But for now, I wanted to just get out the remaining junk from the previous owner out. I did find a few surprises…I found the original windows from the house prior to the addition and the original back door. They were stored above the garage door and were overlooked by everyone. I just stumbled upon them when I banged my head on the garage door and looked up. The door looks really cool, and I hope to find a place in the house.
I also started working on the “backyard.” There really is no yard but there will be. I picked up all the leaves and removed about 3 layers of leaves under the deck. As you can see, we have been busy. My dad has a timeline of when we need to get certain things done so that I can move in by the end of June. We both hope to complete the bathroom this weekend. I have “homework” to take care of while my dad is gone this week to make sure we stay on task.
13 Comments
Jean
5/16/2016 07:23:03 pm
WOW! You all have worked so hard! What a fun thing to see it come together. Tons of credit to you, Bethany, for taking this on! I KNOW WE NEED TO GET THERE AND SEE THINGS (and help - well, Uncle Carl needs to help). Your Dad looks especially good in the Onekama shirt! The blog is super fun!
Tom
5/17/2016 06:29:43 am
and what will Carl provide? Safety glasses? :)
Carl
5/18/2016 06:23:22 am
Never underestimate the importance of good eye protection
Bethany
6/10/2016 08:45:52 pm
Soon the kids can come to the pool!
Tom
5/17/2016 06:15:08 am
I thought of a project for the old back door, in the garage. We can either put it in the garage to give us access to the backyard, through the garage. Or, we cut out the panels and leave the outside rail and styles, and put a mirror in that area. It can be one of those big mirrors you lean against the wall.
Bethany
6/10/2016 08:46:30 pm
Mirror definitely!
Tom
5/17/2016 06:17:38 am
I'll make sure to have Paulie bring his accordion next time, and we'll teach you to Polka :)
Tom
5/17/2016 06:23:12 am
Thanks to Mark and Paulie for the great help that you provided. Mark, get your painters tape ready, more fun to come :)
Bethany
6/10/2016 08:47:42 pm
Yes, thank you so much!! I am lucky to have people like you in my life who are willing to help.
Janice
5/17/2016 12:20:40 pm
I'm really enjoying following your progress. You've gotten a lot accomplished and I'm so excited for you. Makes me want to fix something up in my house. I like the idea of using the old door as an exit door into the backyard.
Bethany
6/10/2016 08:49:25 pm
Thank you!! I hope you have continued to follow! We are definitely thinking about installing a door out back with all the yard work that needs to get done.
Ingrid
5/31/2016 05:14:22 pm
I've been meaning to check out your blog, and I'm glad I did. It's going to be fun following your progress, and I love your writing style and sense of humor.
Bethanh
6/10/2016 08:50:18 pm
Thanks for checking out he blog! I'm glad you enjoyed it! Leave a Reply. |
AuthorA twenty something about to embark on one of the biggest adventures of my life…buying a fixer upper. Archives
September 2016
Categories |


 RSS Feed
