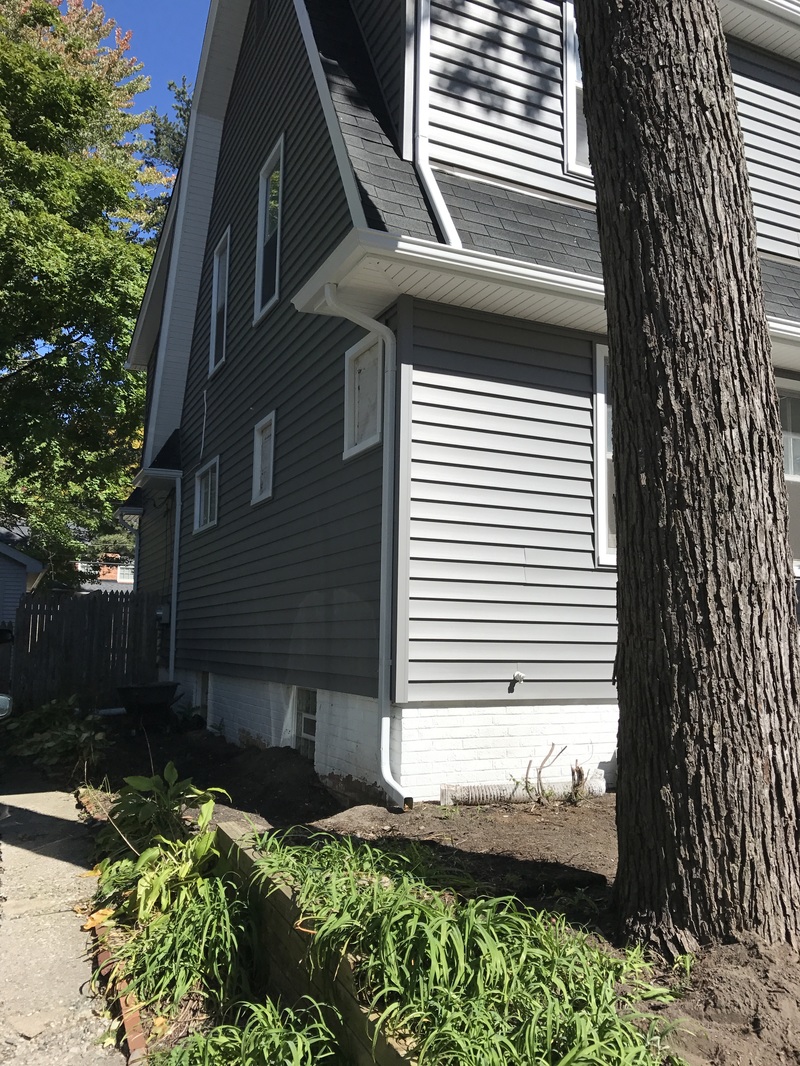
Project 1: Siding My house got a face lift. I am so happy with the final product (which is good since it’s like a car payment)! I went with a charcoal gray and white trim. Only 2 guys worked on this place and I give them a lot of credit. My house is tall…I would not go on those ladders. There are still a few things that I plan on adding next spring/summer like shutters. I will probably go with white. And the door color may change…Let’s face it. I’m a very indecisive person when it comes to paint colors. You will also notice a new hand rail and retaining wall…thanks to my dad who did it all himself because I was at work too late.
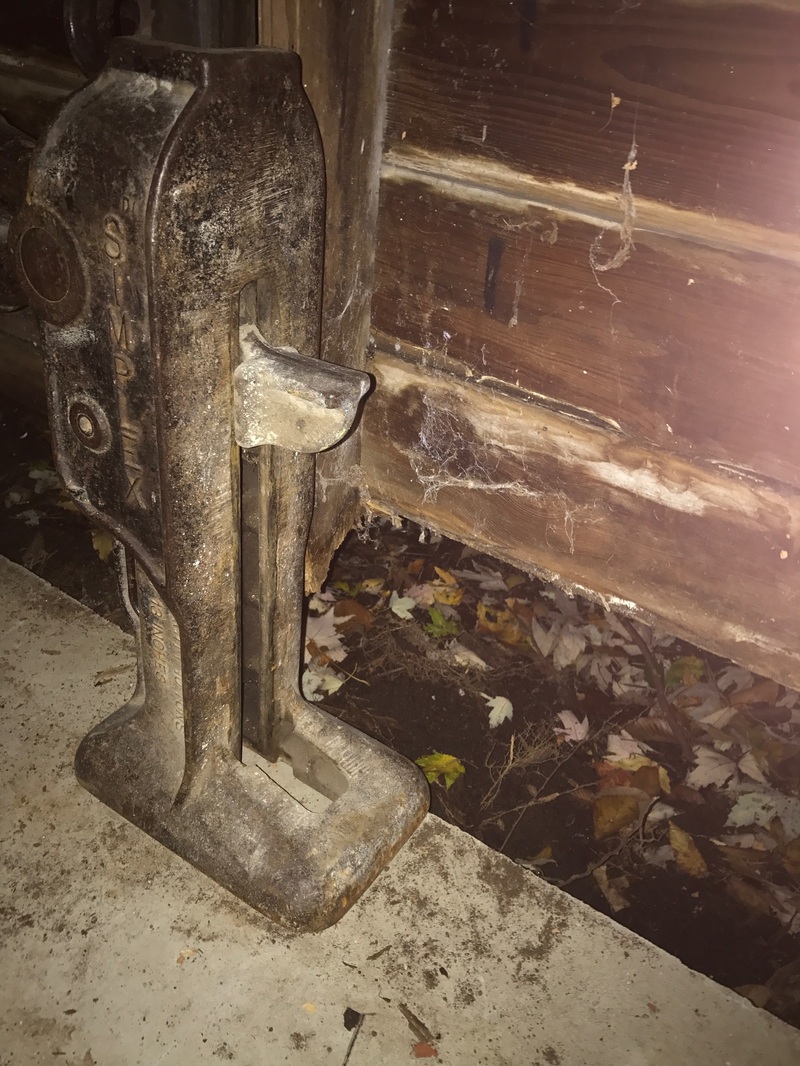
Project 2: The Garage Still not sure why we waited to work on the garage last…but it is finally not sinking! Like I said my dad and his buddy, Tony, jacked it up 8 inches. Luckily the foundation was fine. All it needed was a few new boards at the bottom. My dad also removed the “dog house” on the back and added a door so that I get out to the backyard. My favorite part…the new garage door. It actually opens and closes at the push of a button…trust me that’s a luxury. It is more electrical than my car which has roll down windows and no power locks. For all of you who are asking what did I do…not much. I did prime 2… ok, 1.5 sides. Once the weather gets warmer, a nice final gray (that matches the house) coat will be applied…by my dad.
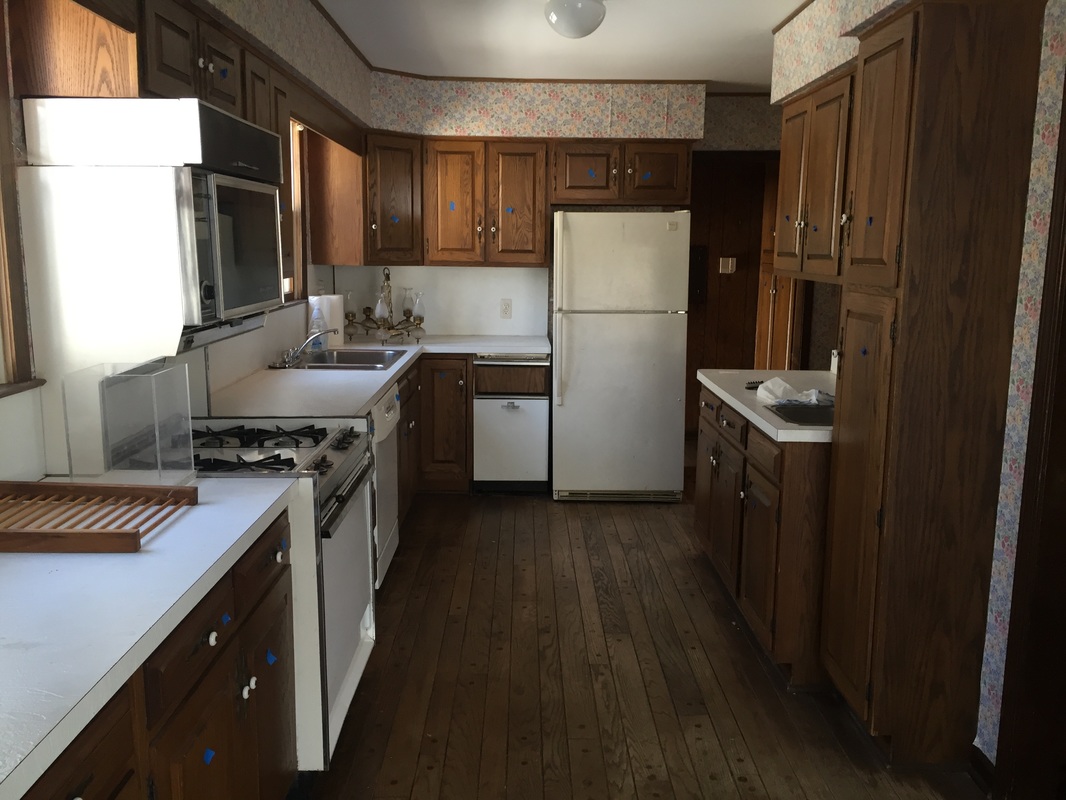
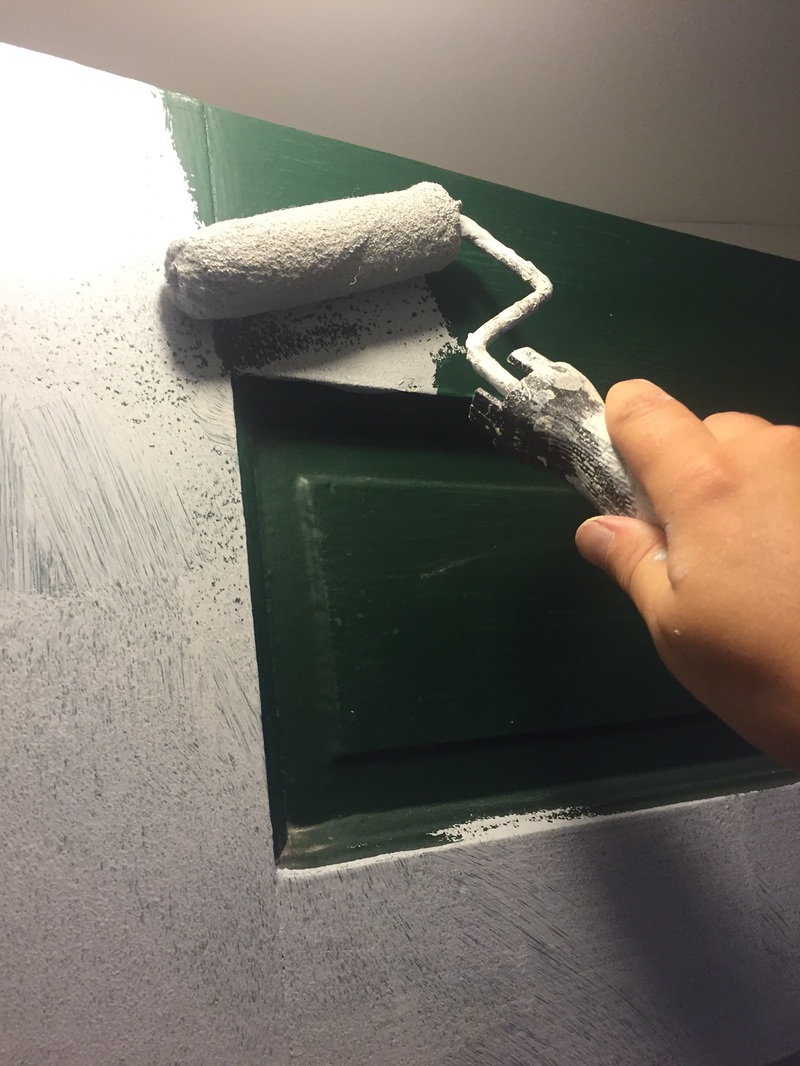
 Project 4: The Kitchen While people were working on things outside, I stayed in the warmth of my house and worked on the kitchen. Now eventually, once my finances are back in check, the kitchen will be remodeled/demoed. In the meantime, I decided to paint the countertops and cabinets to brighten the room up a bit. Home Depot sells cabinet kits that are easy to use. I needed two for the amount of cabinets that I have. It was actually pretty easy to do. It just took a lot of time. The kit comes with step-by-step instructions. I ended up having to put more coats on mine than what was stated in the instructions because I went with white on darker cabinets. I removed all the old hardware and added new ones. I highly suggest buying the handles in bulk…did not realize how expensive they can get, especially when my whole kitchen is cabinets. I also painted the countertops a light gray. Tip: Use foam rollers for this! What is nice is that I get to test out the colors that I am planning on doing my future kitchen in. This is cheaper than realizing that you don’t like it after spending lots of money. In the end, I think it turned out and I really like the colors…not my best paint job but it looks much better than it did.
Now…does someone want to come over and shovel the snow? That was one thing I was not looking forward to when I bought the house.
2 Comments
It has been a while since my last post…but while I have been away we have begun transforming my house. I am no longer the ugly white house on the street. My house is slowly looking like it belongs among the other cute little houses. Between attending conferences, celebrating birthdays, and enjoying some of the fun activities in Detroit, I have been working (slowly) on completing my violation code list. Project 1: Sod It’s official…I am an adult. And adults get sod for their birthday. I was away for a conference on my birthday. My mom ended up surprising me and laid it all down. My dad completed the edging.  Project 2: Yardwork One of the items on my code violation list is that I need to redo my retaining walls in the front. Because this was going to be done, I decided that I wanted to start my landscaping from scratch. I have been working on removing the plants and weeds on the side of my house and the front. I am trying to bring the dirt level down a few inches so that it is level with the backyard. There are still more spots I have to work on, but it is coming along.
Project 4: Painting the Exterior Doors I decided to get rid of the green doors and go for a BRIGHT RED! I never thought I would have a red door, but based on the new siding, it is what looked the best.
Project 5: Siding The installation is going great. The company I went with is doing an AMAZING job! It’s been a week and they are moving quickly. It is so much fun coming home from work and seeing the progress they made while I was away. I went with a charcoal grey and white trim. It’s looking sharp!
My next post will be for a whole new house…and hopefully a garage that is not sinking!
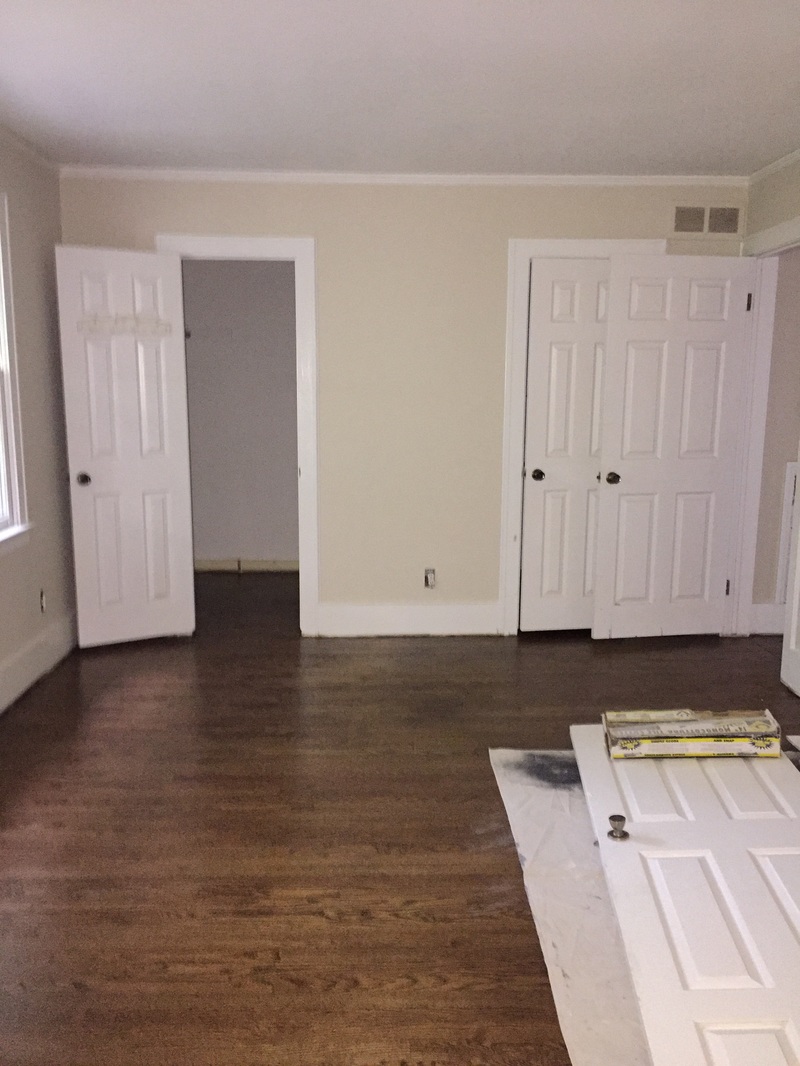
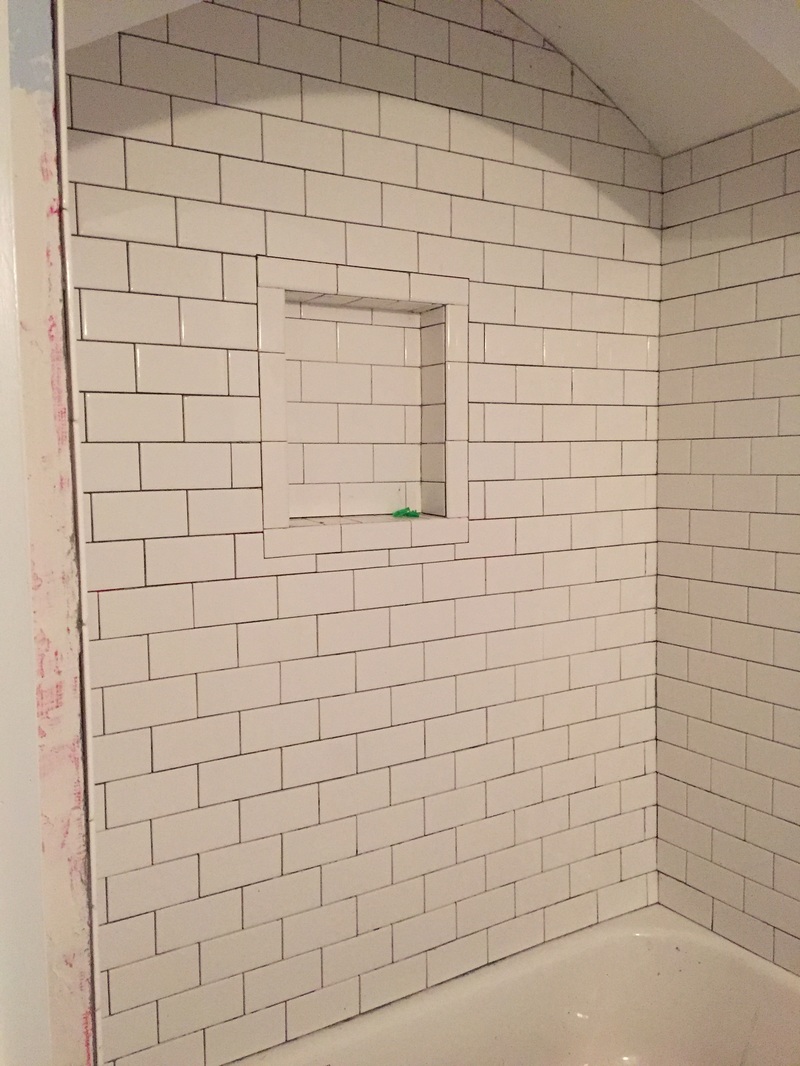
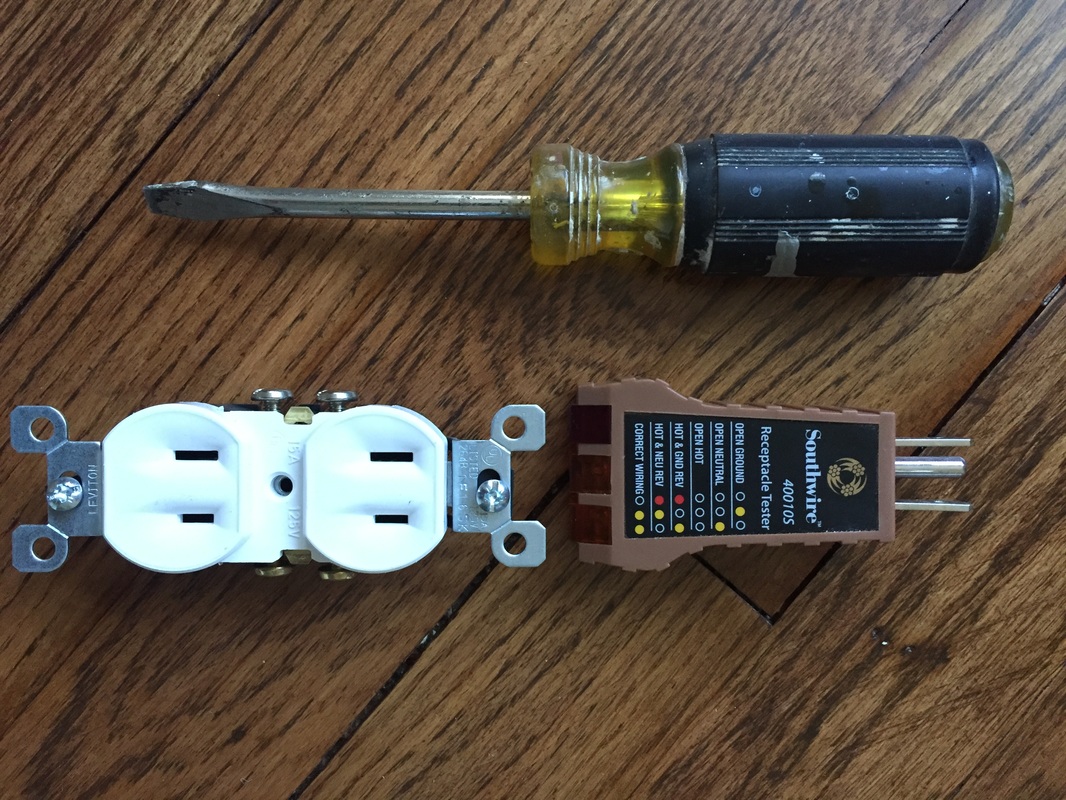
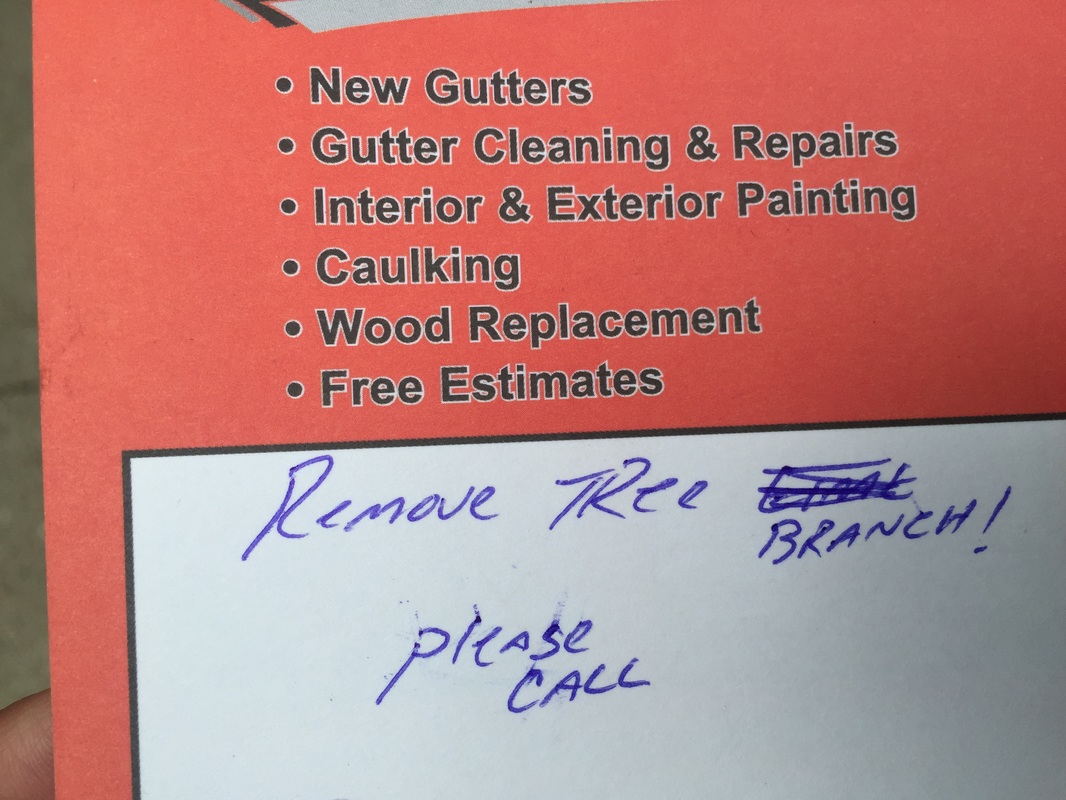
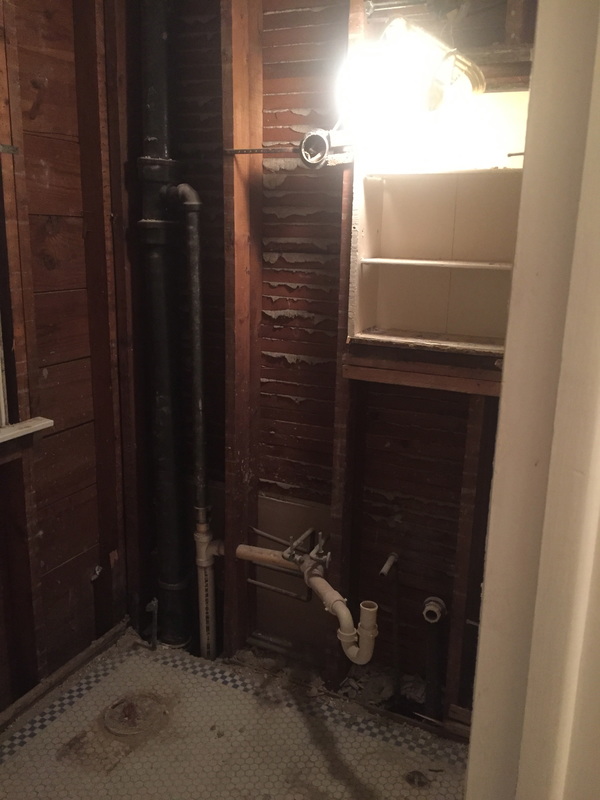
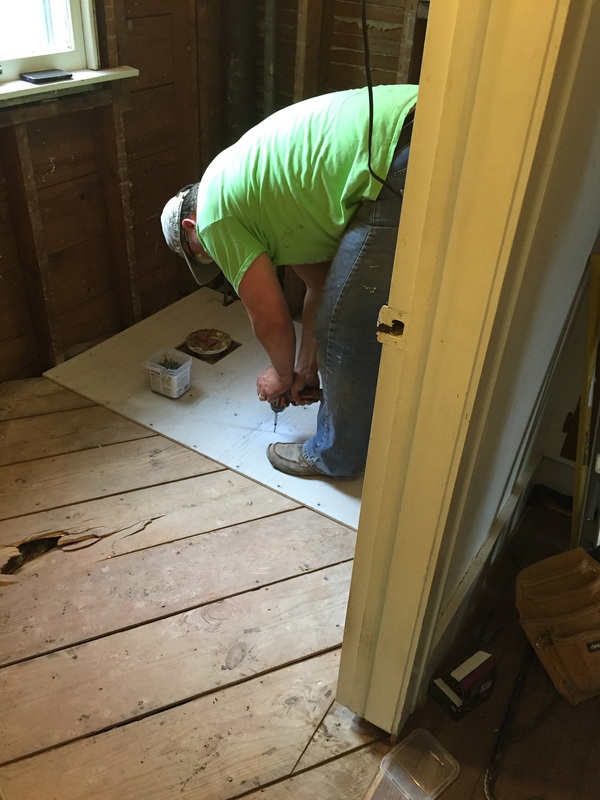
I cannot believe it has been over a month since I last checked in…but let me tell you, it has been a whirlwind! I really appreciate all of you who have taken the time to check out my blog. You all keep me going, and this blog reminds me to make sure I document all the progress I have made on the house. This has been a crazy summer. Between work and the house, I have not had a lot of time to enjoy it. So in between moving my stuff from my Detroit apartment, I have tried to squeeze sometime up north and on our family boat. For those who know me well, I love spending time with family and friends, and this renovation is not going to hold me back from enjoying my summer! Anyways, I have moved in, finally! After about 20 trips back and forth, I was able to move everything…in a Jeep Wrangler none the less. Have you ever tried to move using a Jeep Wrangler with a back window that has to be zipped? It’s not easy! Besides moving, we have gotten a lot done and a lot of things have been brought up to code. Project 1: Finishing the Floors In the last post, I mentioned that that the floors were being sanded. Well after all of my dad’s hard work and help from friends, the floors were all stained and turned out great! I picked out the Miniwax® Special Walnut stain for the floors. We (I mean my dad and Mark) ended up putting on two coats of the stain and 2 coats of polyurethane. Tip: Make sure you follow the directions for drying times to ensure that the finish has enough time to dry. After the last coat was applied, we waited one week before walking on the floors. Project 2: Full Bath Remodel I am LOVING how the bathroom is turning out. The shower is AMAZING!!! We had a lot of help with the tile! I choose white 3” x 6” subway tiles with gray grout (1/16th grout lines). The tiles follow the arch, which took a lot of patience and skill. We had an assembly line going for this project. We had people placing the tiles, someone cutting the tiles, and someone constantly bringing clean water. I helped with the grout…well sort of…my dad, I think, got irritated that I was taking too long to get the grout in the lines or maybe it was more of me pointing out that he forgot a little piece of tile. Either way it is done! We also installed the cabinet, sink and toilet. There was some drama with the bathroom. As my dad and I were working, we started to smell a gassy odor. We first thought it was the oven since we just installed it. But we turned off the gas line and it was still there. I ended up having to call up my local energy company to find out if I had either a natural gas leak or a gas line leak. Luckily, they did not detect anything and the smell has since gone away. After doing some research, people sometimes smell a gassy odor after installing new toilets. We are working on the finishing touches. I will reveal the remodel in the next post. Project 3: The Basement After cleaning the walls, I put on two coats of waterproof/basement paint and another 2 coats of interior paint. I, then, cleaned the floors with the TSP to try to get up the old paint and prepare it for paint. I would suggest waiting to paint the walls until after the floors are cleaned. The walls got dirty in the process because I used a garden hose on the jet spray. I ended up having to go back and clean the walls again. Next, I primed the basement floors. I also added a little project…I learned how to cement! In one of the corners of the basement, the floor had holes in it due to it being a coal shoot in the past. After watching a few YouTube videos and remembering how my dad did it, I gave it a try. I made a mold and mixed up the mix. It was not until I started to lay it down that I realized that I used the wrong type of cement. I had to make a quick trip to the local hardware store to get the right stuff, but the damage was already done. The wrong stuff made it uneven. It turned out okay…not great. You can at least stand on it and it does not hurt your feet. Once everything was set, I painted the floor a slate gray color. Overall, the basement looks a lot better. Down the road, hopefully, I can finish it and make it look better. Project 4: Electric I am learning a new trade…maybe I should give up my job and become an electrician…or maybe not. If you live in an old home like mine, you may have outlets that are not grounded (a.k.a. you have three prong outlets when you need two). I have been going through my house updating the outlets. It is actually pretty easy once you get the hang of it. (Each picture caption describes the steps you need to take.) Almost the same steps can be followed for light switches and ceiling lights. Be patient. This is not something that goes fast…in fact, I still have three more rooms to finish. I also bonded my water meter and hot water tank. I went to the local hardware store and bought the clamps and copper ground wire. It was very easy to do after I watched a few YouTube videos. Project 5: The Outdoors I have some great neighbors…in fact, they are so great that they were looking out for my house and they had to tell me that a branch…wait, a LIMB, fell on my roof! It happened over a weekend I was not around, and it took me a week before I realized what people were talking about. I ended up trimming the front tree to lower the chances of this happening again…I got really lucky there was no damage to my roof. I also ended up getting the trees in my backyard cut down so that I could try to grow some grass. Now that I am finally in the house, my priority is to complete the Certificate of Occupancy items. I am trying to get the little things done on the list, and we are on our way to checking everything off the list. Stay tuned!
 Onekama, MI...our getaway spot Onekama, MI...our getaway spot Hope you all had a great Fourth of July! I sure did…a very much, needed vacation! From babysitting cousins to hosting three community health events to weddings and much more, this summer has been turning out to be a busy one...and did I mention I am down to the last three weeks of my apartment lease. With that said, we have been working hard to get things done and ready. I can say that I now know every nook and cranny in house…and all of it has been painted.  Mr. Mark painting the trim in one of the bedrooms Mr. Mark painting the trim in one of the bedrooms Project 1: Painting every inch of the house…literally To the people I work with or those who see me on the street, yes, I do know that I am covered in paint. To my dad, I apologize for saying you are a messy painter because I think I am worse. I paint well…but the trade off is that some of my t-shirts have become permanent painting shirts. If you are like me, don’t wear anything you don’t want to ruin. I have to thank a lot of people who have helped with the painting. Our family friend/my dad’s best friend, Mr. Mark, is a great painter and has been at the house painting during the day when we are all at work. He has some great tips, like storing rollers and brushes you will be continuing to use in Ziploc bags, that has helped a lot and saved supplies and money. He also is great with painting trim…brush first, roll second. I really cannot thank him enough for all the work he has done.  My mom has become an excellent taper and helps with the painting when she can [even though she goes a bit slower ;)]. She always points out that I get things done so much faster than her…but what she does get done is greatly appreciated. And she was the smart one to wear one of my dad's shirts while painting so that she did not ruin anything of hers! I thought picking out paint colors was going to be an easy task. I realized that you really need to have a look you are trying to achieve before getting paint colors. The first room I got paint for was the new full bathroom. I wanted to go with a lighter blue color since everything else was going to be white…what I picked out ended up looking like cotton candy. So I ended up taking some time and researched and planed what I wanted. I found some great blogs in the process with ideas for my home along with some really great colors. I want my house to be somewhat of an oasis. I am trying to keep it very neutral with tans, grays, and hints of blue. Here are some of my inspiration pictures (screenshots from Pinterest): Project 2: Tiling the Bathroom Floor Once the walls were painted (with the right color), my dad ended up tiling the bathroom floor really quick. The tiles are large and a light gray. I think it will help lighten up of the room and make it feel bigger. The grout we will be using will be the same as the one used for the subway tiles in the shower. This will be the next big project. Project 3: Washing the Basement Walls My mom and aunt helped with getting the basement walls ready for paint. We put trisodium phosphate in hot water and scrubbed the walls clean. This was not the most glamorous job but the paint is sticking to the walls much better than if we did not clean them. Project 4: Sanding the Floors As you have seen in previous posts, my home has hardwood flooring that needs some TLC. My dad, being the woodworker he is, took on the task of sanding all the floors. Some of his buddies came out to help. We learned that stripping gel is vital when dealing with old finish. The old finish kept gumming up the sander. Once everything was stripped, the sanding began and I stayed away. We have met some other milestones…first, all my new kitchen appliances came in (although, they are not hooked up yet). When buying appliances, take advantage of holiday sales. I also got appliances that had a rebate and ordered them online so that I could get cash back through Ebates (ebates.com: if you have not signed up, do so right now…especially if you are an online shopper). Also, my electric provider gave $50 for my old refrigerator and they even picked up. Next, my dad blew the first fuse, which also started smoking…don’t worry we had an electrician check it out and got it all back up and running. Third, I have managed to have flowers stay alive without watering them. I by no means have a green thumb, so when I got to my house one day and saw beautiful orange flowers blooming without me having to do anything, I was happy and they are so pretty, which makes me want to learn how to really put together a garden. Lastly, I have been meeting my awesome, new neighbors...I am one of the younger ones on the street but I love hearing about the history of the street from those who have been here. There is one older couple who go on walks in the morning and afternoon with their canes in hand. The wife walks the sidewalk while the husband shuffles down the street talking to everyone...if you pay close attention, you can hear the wife say "Well are you going to catch up or just let me win another race?" It's really sweet. We have only a few more weeks before I need to move in so we will be working hard the next few weeks. And hopefully in a few weeks, I will have all this paint off my hands!
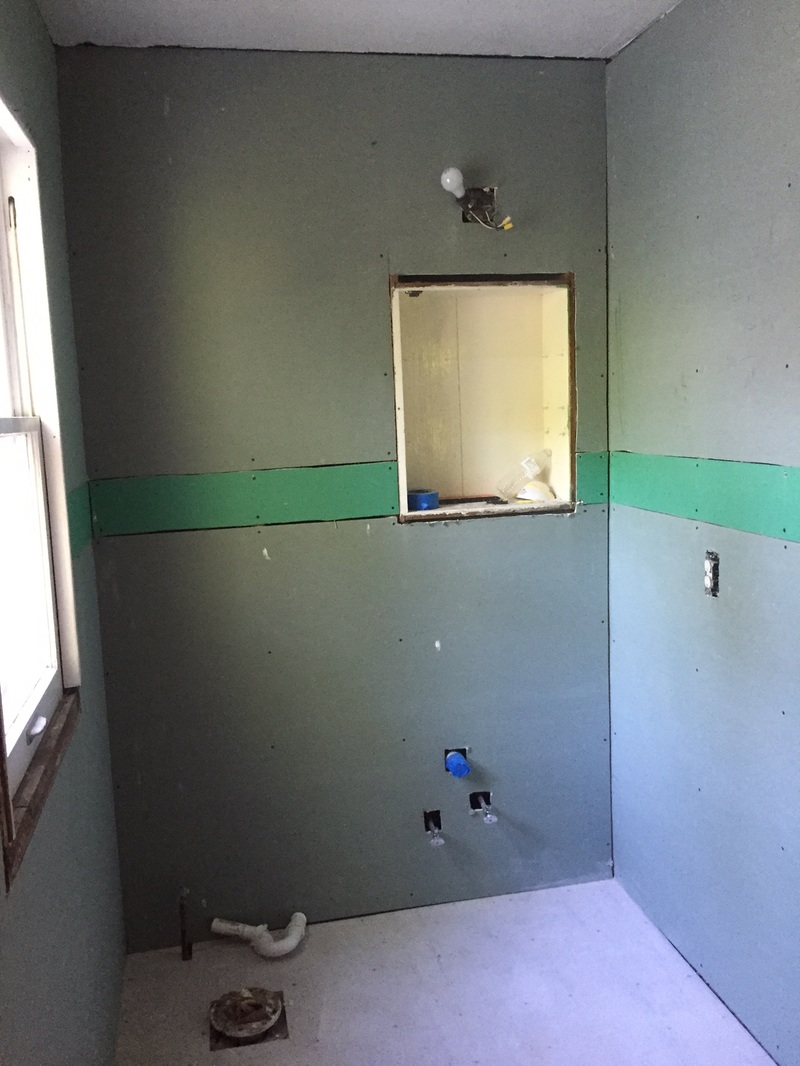
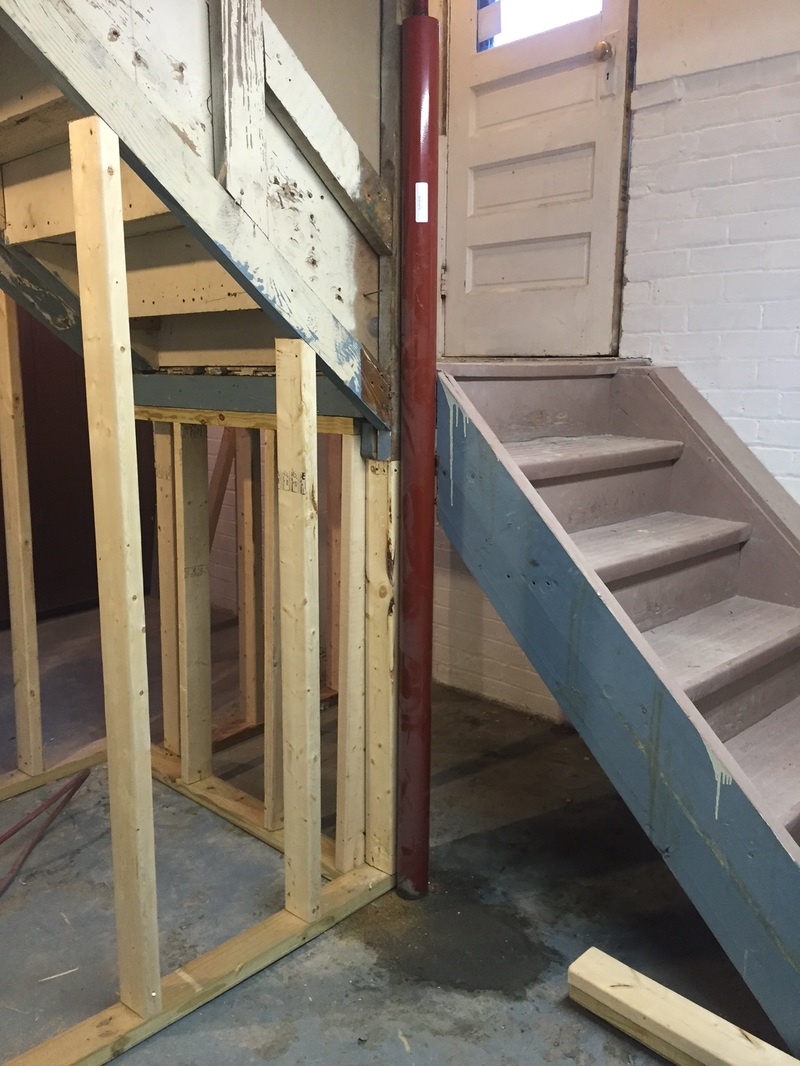
In honor of Father’s Day (…and because all we did this past week was paint), I wanted to dedicate this post to my dad…a.k.a. my contractor, my plumber, my electrician, my everything! Seriously, my dad is the best guy I know. I mean there is not many dads that will get up in front of thousands of people to do the “Single Ladies” that he just learned from my sister (I really wish there was video footage of this). Ever since I was a little girl, my dad and I were together while my mom took my sister to dance. For 8 years, my dad coached my soccer teams and would take me to my Sunday tennis matches. Because we spent a lot of time together, I took up a lot of my dad’s hobbies. One of these hobbies was home development. I loved creating my own floor plans and waiting for my dad to get home from work to show him my drawing. As I got older, I enjoyed designing furniture and watching him make it. I love that I will always share this passion with my dad. I honestly cannot tell you how lucky I am to have a dad like him. He is the one that keeps us girls sane…especially during this process. He has a work ethic that I strive to work up to. He will go above and beyond for others and never asks for something in return. He also is the one that keep us laughing no matter what. So today, I want to say “Happy Father’s Day” to the best dad ever! I am so lucky to have you in my life! I’m back!! It was been a busy couple of weeks…not just with the house, but also my personal and professional lives. Last week, the Section, within the Department of Emergency Medicine, I will be managing/directing (we haven’t decided on my title quite yet) was announced. My close family friends (and neighbors) got married. My goddaughter turned 6. I ran a 5K for breast cancer. Made my first mortgage payment! I am probably missing more important life events…thank goodness I have my calendar on my phone or else I would not know where I need to be. On top of all of this, we have made A LOT of progress on the house! Project 1: The Full Bathroom This project is moving right along and is looking good! Since the last post, all the drywall was put up. Drywall mud was applied by my dad and fixed by our plaster guys (They said they have seen worse). The tub was installed. Tile for the walls and floor was bought as well as the cabinet. I am really pleased with this the archway for the shower. My dad placed wood where the plaster was removed and our plaster guys were able to come in and smooth it all out. It looks AMAZING!!! Project 2: The Basement My house is not jacked up anymore!!!! It was a great day when all the support walls were completed. We (I mean my dad and his best friend Tony) placed a metal support on the pier where the wood was rotting underground and cemented it in place. The house is so much more level now. It is crazy to think the house was raised about 3 inches in this one area. While the men were handling the manly things, I got to work cleaning the dryer and washing machine. For the washing machine, I cleaned it by:
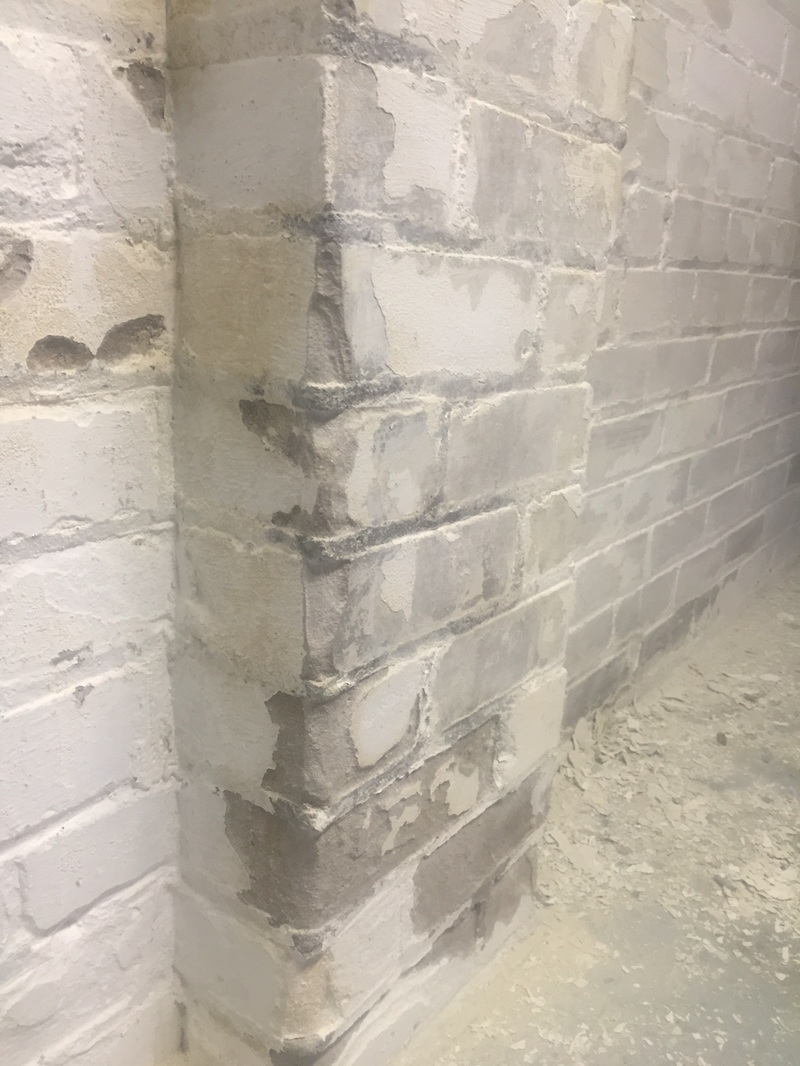
Project 3: Scraping the Basement Walls Brick foundations are very strong; however, when water and brick mix, you can have efflorescence develop on the brick’s surface. It is really important to scrape this off and repair it. I used a steel wool scraper to remove the efflorescence. When we do the wood floors upstairs, I will be in the basement cleaning the walls with Trisodium Phosphate (TSP) and painting them. Project 4: First Wall Down I helped my dad take down a wall. And let me tell you, open concepts are the way to go. The wall we took down was between the stairs in front of the side door and kitchen. The kitchen already looks bigger and brighter.
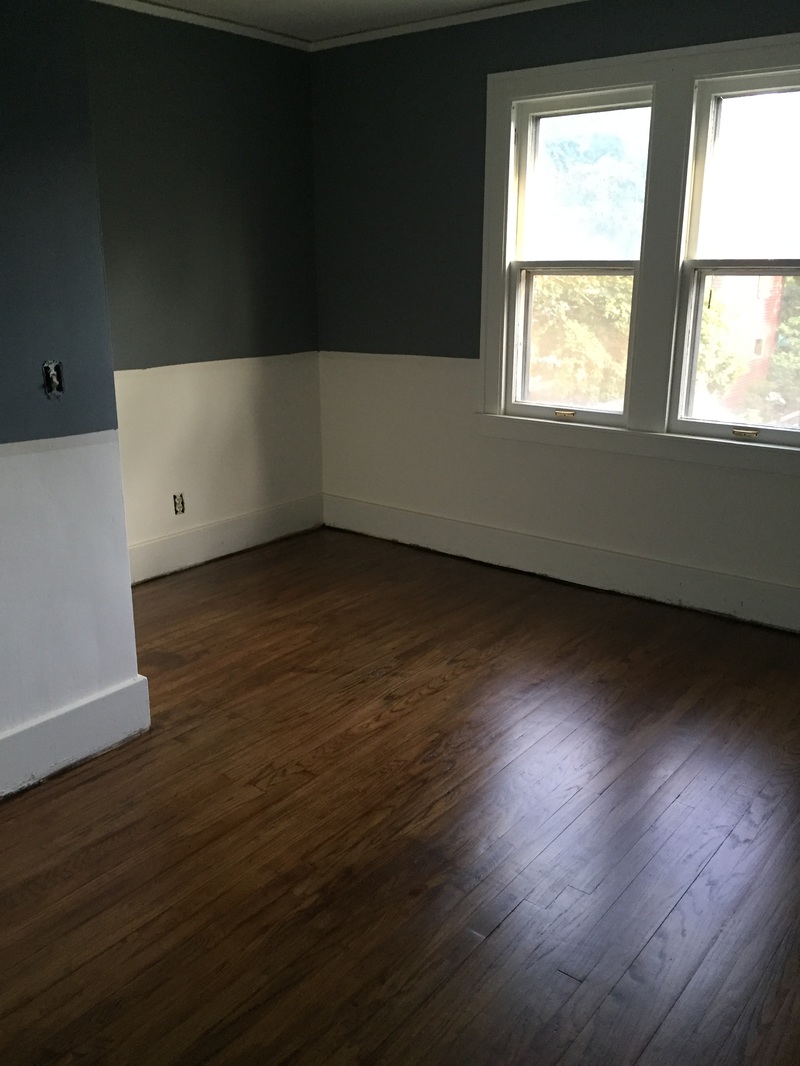
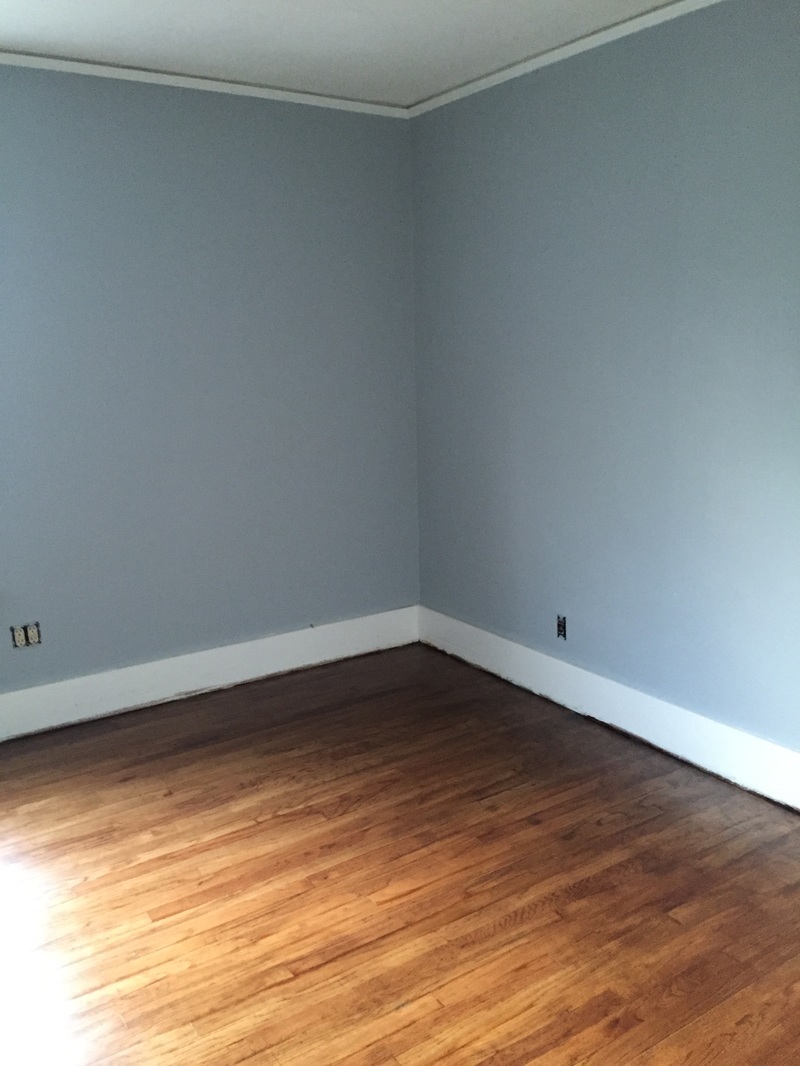
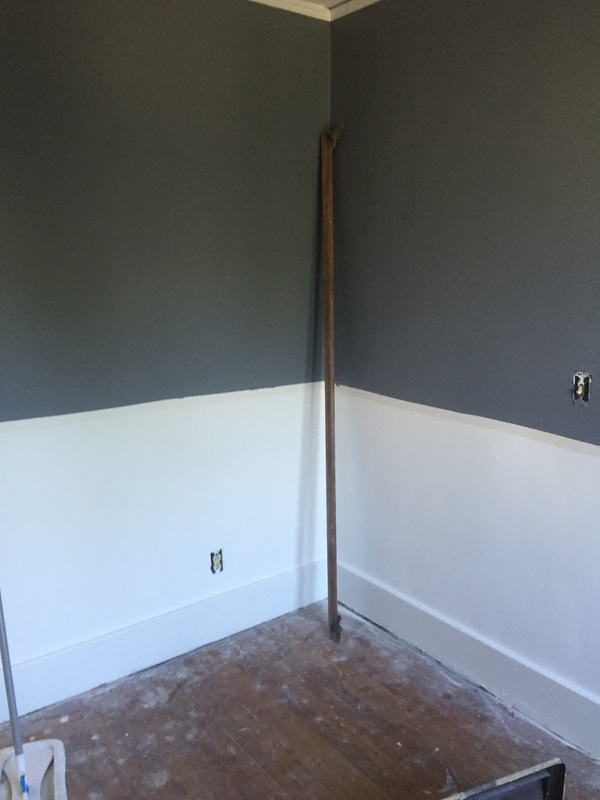
Project 6: Fixing Plaster/Drywall Mudding You have probably noticed that there were many cracks in the walls…especially from jacking up the house! Well my dad and I tried to fix some on the minor cracks with drywall mud. I have fixed holes in the wall from nails before, but not for cracks. So my dad attempted to show me how to do it…and this is our conversation: Me: I want to learn how to do this. My Dad: Try this steam. (He hands me the tools and mud…I give it a try…I notice my dad getting antsy/annoyed) Me: Is something wrong? Am I doing this right? My Dad: Well I could have done this whole room in the time it took you to this one seam. (He then took the tools back and I went back to my wallpaper.) My drywall; mudding career lasted like 10 minutes before I was kicked out. Project 7: Picking Paint Colors Now this is the fun part! My mom and I went to Sherwin Williams and picked out paint. One thing about my family is that when we go shopping we know what we want and do not spend time looking around. We have an idea, and we go with it. I had the main floor paint color picked out within 10 minutes. I was between two colors. I went with the lighter of the two, knowing that I can adjust the color to the darker one if I change my mind. One of the bedrooms is a nice gray and the full bathroom will be a light blue. We have already started painting the bedroom and all the ceilings are done. It is looking nice. I am grateful of our family friend Mark coming out to paint because painting is not my dad’s specialty. He rushes through it and it gets messy (Yes, Dad, I am calling you out!). Project 8: Backyard We have not just been working on the inside. We have been moving dirt to get the grade to move away from the house. First, my mom moved about 800 pavers from the backyard to the dumpster. I dug out an old cement slab that was under a layer of dirt. Then, my mom and I moved the dirt from a flowerbed that was on the driveway (why this was on a driveway is beyond me). This flowerbed was about 8ft x 2.5ft x 1ft. It was not small, and it took a full afternoon to move. I’m not quite sure how the girls got stuck with this task while my dad was in the air-conditioned house just mudding. Learning the Area: In between projects, I have started learning about my new community. I moved to this specific area because of the community. People are always outside riding bikes, walking dogs, and going for a run. I like the little downtown areas.
 Pinterest Picture: magnoliamarket.com Pinterest Picture: magnoliamarket.com I am finally taking a night off of working at the house since I have a crazy work day tomorrow…May 17th is World Hypertension Day! Get your blood pressure checked and help the World Hypertension League meet their goal of 3 million blood pressure screenings!...shameless public health plug. Anyways…it has been a busy, productive week at the house. Many visitors have come out to help. I have really appreciated all of the support and hope I can return the favor someday soon. Project 1: Stripping the Banister Every piece of woodwork in the old part of the home has been painted. I saw a picture of a staircase on Pinterest where the banister was stained and the spindles were painted white. I decided to do this. I bought some paint stripper from Home Depot. I found one that was foam in hopes that it would not drip everywhere. So this is what I did:  Step 1: Collect your supplies. I used Klean Strip™ Premium Stripper. I taped all of the spindles. You will want a sharp scraper. I got a few in different sizes due to the shape of the banister. You may want to invest in tarps to protect the flooring. Also, do not forget your protective gear, a mask and durable gloves. Trust me…this stripper burns when it comes in contact with your skin. Non-latex gloves did not help much either. I ended up using construction gloves, and they kept my skin protected. Step 2: Protect the areas that you do not want striped. I placed blue tape on the spindles. I cut a few garbage bags and laid them on the ground (I did not have any tarps).
Step 3: Spray the paint stripper and cover all of the desired area. You need to wait for a short period of time to begin scraping. For my project, I had to wait about 15-20 minutes.
Step 4: Once the paint appears to be peeling off, use the scraper to remove the paint. Go with the grain of the wood.
 Step 5: Reapply the paint stripper if you were unable to get off all of the paint. There were 3 layers of paint and 1 layer of stain on my banister. I ended up having to repeat it 3 times. **Next Weekend** Step 6: Sanding and re-staining! I attempted to sand it and did not feel comfortable at all with the sander…Dad Project! Project 2: DEMO BATHROOM DAY! I finally got to knock down some plaster! Let me tell you…if you are having a bad week, find yourself something to demo. Swinging a hammer and knocking things down just took stress away. My dad and I decided that the first major project that needs to get done is renovating the full bathroom. Throughout the week, my dad and I began removing the wall tiles, the bathroom fixtures, and the tub. I am a germaphobe…and my dad made me help me carry down the toilet! I had such a hard time with that. I know it probably sounds ridiculous, but I am not about that and I think I washed my hands raw that night. I highly suggest cleaning up your demo as you go. We made sure to clean up any debris before we would leave for the night. I think it just helped move the project along. It was really cool to see the window’s hardware. My windows open and shut using a weight system. It is neat to see how it works. The tub was the difficult part to remove. We (my dad mostly) had to cut it in half in order to get it out. Cousin Paulie, my dad’s cousin, came out and helped remove the floor. (I ended up saving some of the tiles. Not sure what to do with them. If you have any ideas, let me know!) I love it when my dad gets together with family members/old friends. All the stories start coming out. This weekend, I got stuck listening to these two singing polka music. Next, came shopping…the fun part to me, not my wallet! Lowe’s and Home Depot are usually next to each other so do not be afraid to get things from both. Home Depot had a good sale on a toilet and a tub so we got those there. Tip: Check out the tiles on the floor. Most likely, they are on sale. That is what I ended up purchasing. Lowe’s had a vanity I wanted as well as a countertop. After purchasing a faucet and showerhead, I had the supplies I needed for a bathroom. My dad also got: thin-set, liquid nails, cement boards, and drywall (those are not so fun to show). My dad’s good friend Mark also showed up and helped lay down the cement boards and install the tub. Project 3: The Basement My house is still propped up by jacks. But we did make some progress with leveling the flooring in the living room. Cousin Paulie helped my dad build the new walls that will support the house once the jacks are removed. The crawlspace is also coming along. My dad has started adding insulation. He cleared out the space, but we still have a pile of dirt to remove. He also installed overhead lighting in the crawlspace. Project 4: The Backyard and Garage I started clearing out the garage. The garage will also need to be jacked up and new walls will need to be built. But for now, I wanted to just get out the remaining junk from the previous owner out. I did find a few surprises…I found the original windows from the house prior to the addition and the original back door. They were stored above the garage door and were overlooked by everyone. I just stumbled upon them when I banged my head on the garage door and looked up. The door looks really cool, and I hope to find a place in the house.
I also started working on the “backyard.” There really is no yard but there will be. I picked up all the leaves and removed about 3 layers of leaves under the deck. As you can see, we have been busy. My dad has a timeline of when we need to get certain things done so that I can move in by the end of June. We both hope to complete the bathroom this weekend. I have “homework” to take care of while my dad is gone this week to make sure we stay on task.
Well I have been officially a homeowner for 1 week! And it has been a crazy week! Before I even had the keys in my hand, my dad had an excel sheet printed out with everything that needs to get done. His program manager background is going to keep us on track! Friday: Just Signed My Life Away…Now What? After opening the door to my new home, my parents and I were ready to get started. Little did I know that the electricity was already shut off, and there was no way for me to get it turned on until the following day. So in the little bit of daylight, my mom started peeling of wallpaper because she hated it. Using our phone flashlights, we peeled off wallpaper until we could not anymore. Saturday: Fun-Filled Day My dad was ready to get to work bright and early in the morning…I was not! So I handed over my keys and let him have fun.I, instead, decided to go with my mom and sister to a flea market (miantiquefestival.com). If you live in Michigan, I highly suggest going. They only hold it a couple of times a year, but there are so many vendors that attend that you are sure to find a treasure. I watch way too much of Flea Market Flip on HGTV, and always hope to find something that can become a statement furniture piece. My shopping list consisted of finding a burlap sack and a railroad cart. After making the rounds, I did not spot anything. I saw a railroad cart that was cheap but not in great shape. I decided to buy it; however, I found out people take antiquing seriously and some lady yelled at me for looking at it. Apparently, her daughter was going to buy it, but was still debating. Doesn’t that mean I could buy it? I guess not. As we were walking out without any purchases, I found a burlap sack in perfect condition with the colors I was hoping for (I will post what I do with it in the future). Then…literally the last vendor we visit…I found a railroad cart in perfect condition! The downfall, it was $400! So I tested out my negotiating skills. I talked the vendor down to $280. I took it and never looked back! Then came the task of rolling it to the truck. My mom and sister (who act like the Gilmore Girls) told me that they would get the truck and pick me up. Well 10 minutes later, I get a phone call saying “Bethany, we don’t know how to get to you. So can you just wheel yourself to the car?” So here I am with a railroad cart that probably weighs 200-300 pounds rolling it about a half mile up and down hills. When I get to the truck, I find the two of them sitting in the car laughing at me pushing the cart. It probably was a funny sight, but I could have used some help. At least I got what I wanted (I will post how I restore the cart in a future post).
 After spending the morning at the flea market, I finally headed to the house. I found my dad had already cleaned out the crawl space (Thank goodness because I was not crawling in there), took apart a few bookshelves, and removed wallpaper in one room. A man with a mission! So the first thing I really wanted to do was remove the carpeting. This was the first surprise. Upstairs under all the carpet, there was hardwood flooring in great condition. All the flooring needs is a good sanding and new stain. My job for the day was to remove the tacking along all the walls. To do this, I used a crowbar and hammer. Aim for the nails and pry the tracking strips off the flooring. It is tedious task but needs to get done. This is how I spent my whole afternoon.
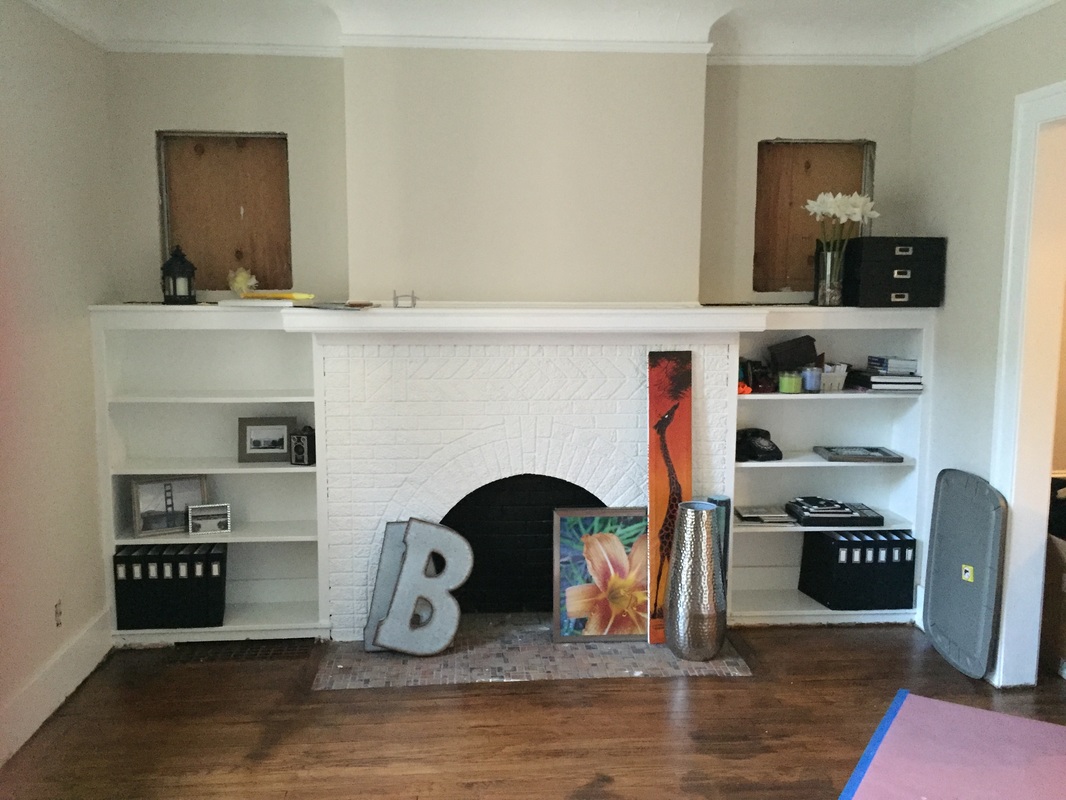
Sunday: Looking for Windows I got to the house bright and early in the morning. I wanted to surprise my dad with a “clean” house. We started piling everything in the living room. I wanted to take it outside while we waited for a dumpster. I was in the process of prying more of the tacking strips off the floor when my dad made it to the house. I think he was impressed that I got everything out the house.
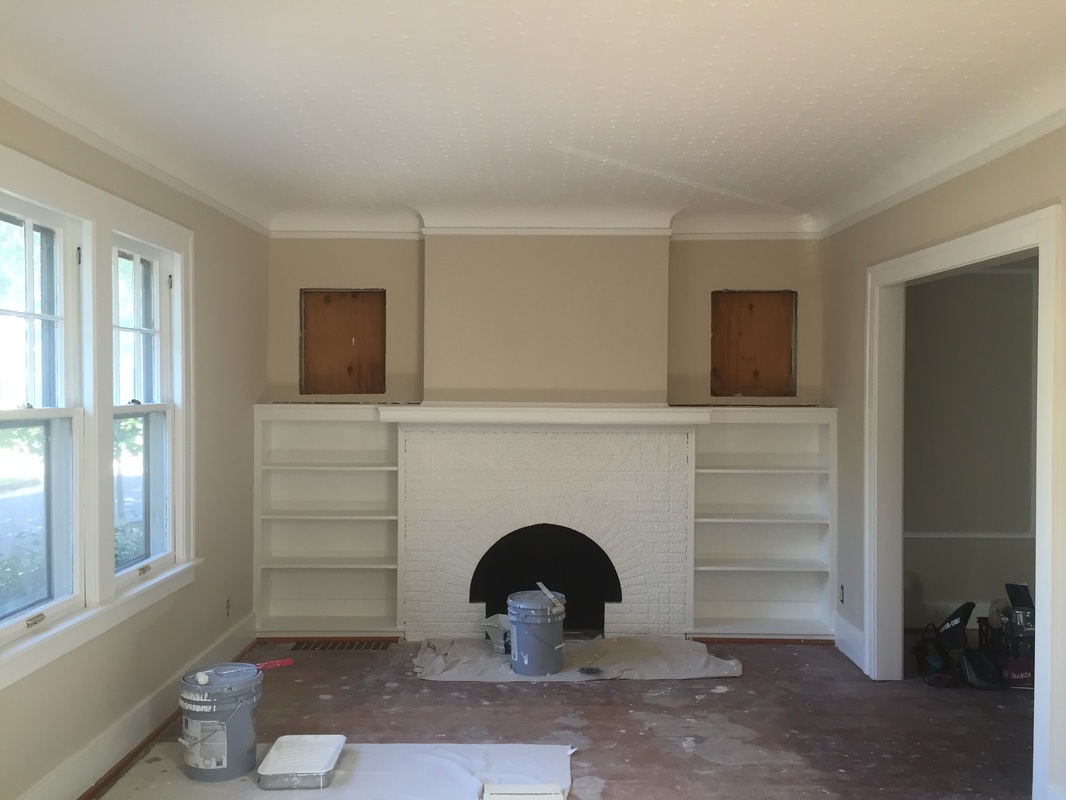
I asked if we could finally see if there were windows behind the built-ins in the living room around the fireplace. Many homes in the area have beautiful stained glass windows next to the fireplace. We could see that at one point there were windows around the fireplace, but they had been covered up. We thought we were going to get lucky again since we already found the hardwood floors and the previous owner thought the windows were just covered up by the built-ins. So we started demoing. To prevent cracking to the plaster ceilings, we sawed the selves in half and pulled them out. This was mostly due to the way they were built. Next came a layer a plaster. As we started peeling it away, we saw wood. My dad thought that this was possibly protecting the glass windows. He then decided to try uncovering the windows from the outside. We hit more wood there. At this point, we were guessing that the windows were not there. And we were right. Both pieces of glass were missing, but the original windowpanes were there. So now I know the size windows I need and can start searching.
After this disappointment, I went back to my tacking strips. That didn’t last long because my dad decided to start working on leveling my floors. This meant that jacks and poles needed to be placed in the basement. What we found was that some of the wooden structure support below the basement floor on a pier was rotted. We cut the rotted wood and started jacking up the house so that we could prepare for the addition of new beams and structural support. Let me tell you…it is not a great feeling hearing your home cracking and settling. Most of the upstairs walls above where the basement was being jacked buckled and will need to be repaired. We were expecting this, but it is still scary.
Once this was done, I thought that was enough for the day. My dad left me a list to complete while he was away for work. Overall, it was a successful weekend. And throughout the week, I was able to remove wallpaper in another room and got all of the tacking strips up and staples out of the floor. When I got home from work on Friday, I had no energy to go work on the house. So I took the night off to prepare for full Saturday…hopefully, more good surprises!
 I will never forget the moment when I learned I was about to become a homeowner…and let me tell you, it does not happen the way our favorite HGTV shows portray it. I was not at a restaurant where my realtor just got off the phone with the seller’s response. There was no hand shaking. No cheers. I was in sweats walking to the gym when I found out my offer on my first fixer upper was accepted. Finding a Realtor I was lucky with finding a great realtor because she worked with my dad previously when he was looking for a home to flip. If this is the first time that you are buying a home, I really suggest that you use a realtor. Find one that is familiar with the area that you are interested in and that has experience. My realtor was awesome. Now, I cannot say the same for the seller’s realtor. Mine ended up having to educate and help him throughout the process too. My realtor also meant business. The seller only had hours to decide to accept my offer or to get back to me about the condition of the property. She set me up with reliable companies for my inspections. I really cannot explain how blessed I was with my realtor. But I would not be able to write this blog if it was not for her! Making an Offer If the first home offer you place is accepted, you are one lucky person. The rest of us get to enjoy multiple open houses, bidding wars, and just the overall stress of “where am I going to live when my lease is done?” I was pretty lucky that my offer on the second house I wanted was accepted. I learned the hard way that if you like a house, do not wait to put in an offer. That is how I lost the first home. My home (saying that is still surreal) went on the market in the middle of the night. As soon as I woke up, I contacted my realtor and had a viewing scheduled that day. I did not make an offer on the home right away because this fixer upper was a big project and came at a high cost. But a few days later, the listing price dropped $26K overnight. At 7:30a, I put in an offer $19K under listing price. After some negotiations, the seller accepted my offer, which was $40K less than the original listing price! My Offer was Accepted, Now What? Before making an offer, you should have already contacted a lender to get a pre-qualification letter. I asked for about $20k over what I really wanting to pay so that I had some wiggle room. Now the inspections! As stated above, my realtor gave me names of companies that she trusts…and that was good enough for me. Because I was purchasing an older home, I decided to get a home, pest and sewer inspection. Be prepared to learn about every crack, creak, and cranny of your home. My inspector took me on a 3-hour tour. I was told to bring a pen and paper with me, but he was talking so fast that I could not write down a thing. He actually walked around with a recorder and gave me a copy of it. I was later able to listen to 45 minutes of what was wrong with my house and jot down notes. Overall, the inspector said the home is a great structure, but will require a lot of work and money. Little does he know, labor is free or me! The pest inspection was not as entertaining…but who really wants to go looking around for termites, spiders, etc. Luckily, my home was pest free…and I will keep it that way. The most disgusting part of inspection day was looking at the sewer. The inspectors put a camera down the sewer pipe to see if there are any sags (aka. there is no slope down towards the main sewer line). This was the last inspection of the day. Everything was looking good for the house and then we hit mud. We ended up having the inspector snake the line. My realtor and I went up-stairs and started flushing toilets to help. We found a small sag. Luckily, they were able to get passed it, and made it to the main city sewer line! What came back up with the camera is something I will spare you all. Overall, there were no roots or cracks and because the house was vacant awhile, mud was probably just building up from the recent rainstorms. The inspections were complete without any red flags. I was so happy and decided to proceed with the purchase. In the community where the house is located, a city inspection is also required to determine if there are any code violations. If there are no violations, a certificate of occupancy (C of O) is issued. Well, the report for my house ended up being about 3 pages long and everything on the list was the seller’s responsibility to complete. Here is where the fun began…so the seller was not aware of this. With only a 45 day closing, there was no way that they would be able to complete everything that was on that list. So, I decided to negotiate even more on the purchase price and took responsibility of the C of O. The seller was hesitant and declined my initial offer. However, we were able to talk them down another $25k. So now I was getting the home for $65k below the initial asking price. This was an amazing deal…I could not loose it! Picking a Lender Today, we are all on our phones/computers most of the day. Days of going into the bank to deposit a check is long over. Apparently, mortgages can now be done online too. I am going to explain why you should stay old school with this. My mortgage application process was awful, and I hope people can learn from my experience. So I did my mortgage through a large bank’s online system. It was nice. I could upload all the documents I needed to submit to the system. At first it was super easy and a smooth process, but that did not last long. I got a call from my mortgage broker one day stating that they would be declining my loan application due to my debt-to-income ratio. This is due to the fact that I have student loans (which I pay every month). I have never paid the standard rate on my student loans, because I always qualified for the income based payment plan that is slightly lower. In order to get my ratio to change, either my income needed to increase or I needed to pay off a loan. I thought I was in luck; I was just starting a new job with higher pay! They say changing jobs mid-mortgage application can be bad thing, but my broker thought this could save my application. A week went by, they denied my loan again all because my new job offer letter state “this position is non-tenure.” Because they could not be sure that my job would last three years, they would not accept my loan. This was 8 days before my scheduled closing! There was no way I would find another agency to make my closing date. I tried everything to get them to change the status of my application. I contacted my HR department and had them contact the broker. I tried to get my parents to co-sign on the loan. I talked to my broker at least 10 times a day, even if he did not want to talk to me. I was persistent reaching out to supervisors. I was so frustrated. How could they say any other job would last 3 years? At my new job, I am managing million dollar projects that will last longer than 3 years. After days of pushing and making about 30 calls a day to the bank, they accepted my application; however, I had to get a bunch of other documents for them in a short period of time. I am making this sound a lot simpler than it was, but I really do not have the time or the strength go through that roller coaster ride. I ended up having to write a hardship letter to allow me to sign on time. If I would not have been able to sign on my scheduled day, I am pretty sure I would have lost the home. Moral of the story, ask your realtor about lenders they recommend and go into an actual branch and sit down with a person. Closing on my First Fixer Upper I closed on a Friday. I had hard time concentrating at work. I was so excited…all my hard work paid off! I did a final walk through with my realtor about an hour before the closing appointment. I could not believe I was about to own my first home. When I got to the closing table, I was able to meet the seller, the previous owner’s son. At first it felt a bit awkward. The previous owner had recently passed. Because my lender was slow with giving us the “okay” to go through with the purchase, we sat there with the seller who has to get rid of his childhood home. I think he appreciated knowing this was my first home and that I wanted to make the property look nice. This made the situation a bit easier and we all needed up having a great conversation. I learned a lot of the history of the street and the property. After 2 hours, we finally were able to go through with the purchase, and I was given keys to my first home! The next step…opening my first fixer upper!  |
AuthorA twenty something about to embark on one of the biggest adventures of my life…buying a fixer upper. Archives
September 2016
Categories |


 RSS Feed
